Find answers to the most frequently asked questions about actiPLANS
No results...
This section provides you with the basic information on how you can start managing staff absence with actiPLANS.
Before you get started with actiPLANS absence management software, we suggest that you watch our short product demo. It will provide insight into how actiPLANS works and what you need to set up to start managing leave time.
If You Already Use actiTIME
If you already use actiTIME Online, you can run actiPLANS trial directly from your actiTIME account.
In the integrated products the following data will be shared and you will not need to create it again:
During the trial period, the number of user accounts with enabled access will not be limited in actiPLANS, so you will be able to evaluate the product on your real data without any limitations.
Later, when the trial expires, you will be able to decide how many actiPLANS users you need – even when the products are integrated, each of them has its own license with its own number of users and effective dates.
It is possible to have an actiPLANS license for 40 users and actiTIME license for 20 users only (and vice versa).
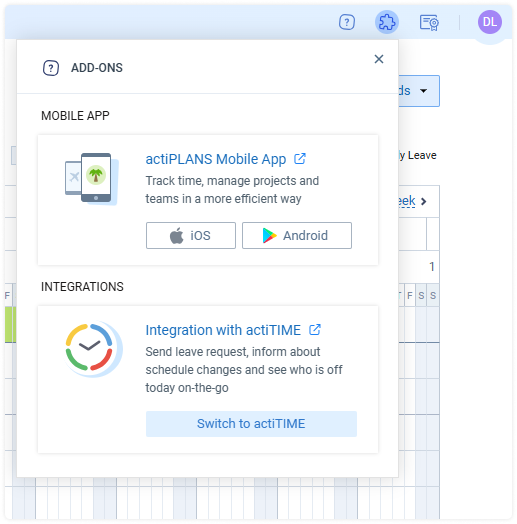
To start actiPLANS trial from your actiTIME, log in to your actiTIME Online account, click on the ‘puzzle’ icon located at the top of the interface, and choose Integration with actiPLANS:
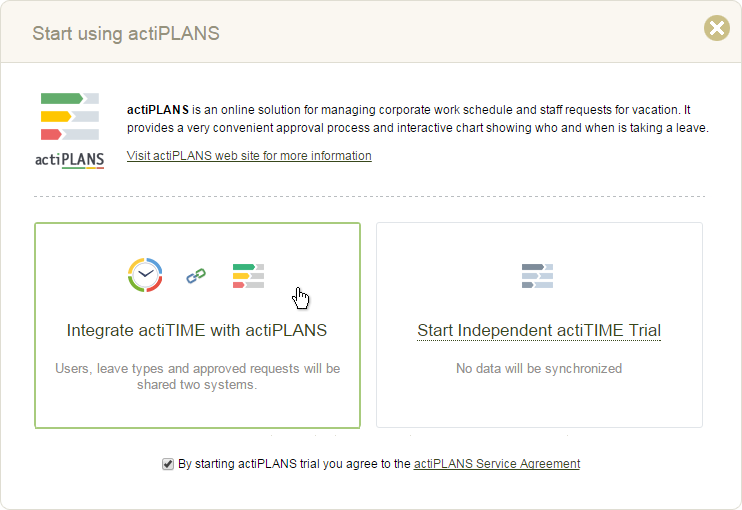
You will see a dialog offering you to start an actiPLANS trial.
To start using actiPLANS in the integrated mode, choose Integrate actiPLANS with this Account.
Your actiPLANS trial will start in a couple of seconds.
Configure managers’ permissions– Permissions are not imported automatically from actiTIME, so you will need to specify who will be able to manage leave requests, PTO settings, and user accounts in actiPLANS.
Assign approvers to system users– By default, the ‘automatically approved‘ option will be set for all users (which means that approval is not needed).
If there are users whose leave requests require approval, specify leave time managers who will process their leave requests.
In addition, you may need to change the following settings defining access permissions to leave requests in the absence management system interfaces:
Access to personal schedules for regular users– By default, users can see the schedules of all their colleagues in the Leave Scheduling or Locations interface. You can limit the list of colleagues to the users from the same user group, or completely hide the schedules of other users.
Access to leave time requests for Leave Time Managers– By default leave time managers can see and process leave requests submitted by assigned users only. You can change these settings and allow leave time managers to see requests submitted by other system users as well.
Running actiPLANS with Demo Data
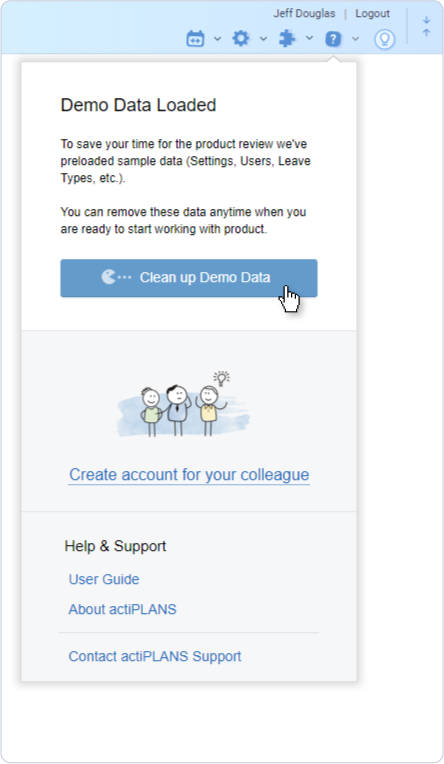
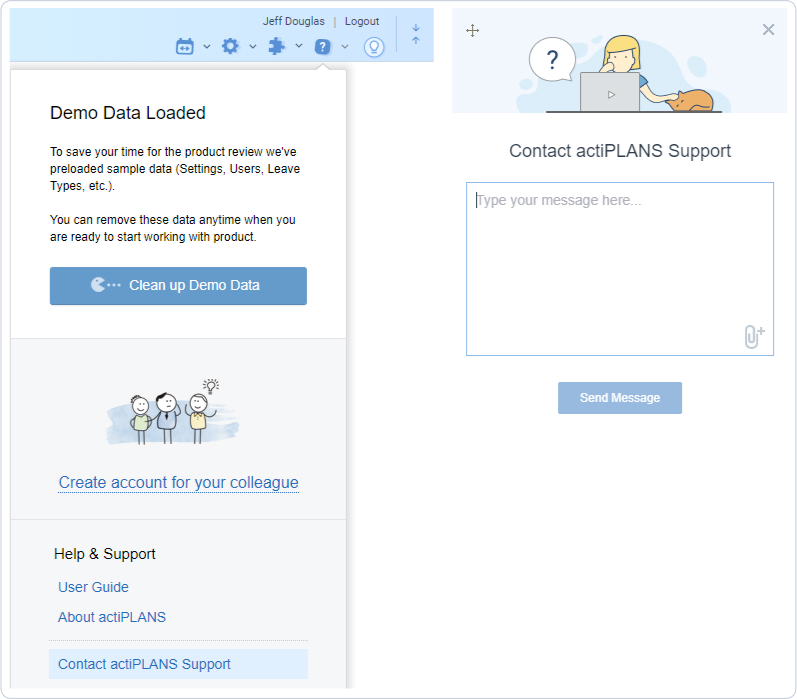
When you start actiPLANS trial from the site or choose to start an independent actiPLANS trial from your actiTIME account, demo data is loaded into the system.
Preloaded demo data will help you take a look at how actiPLANS works and save time on entering demo data and configuring the product.
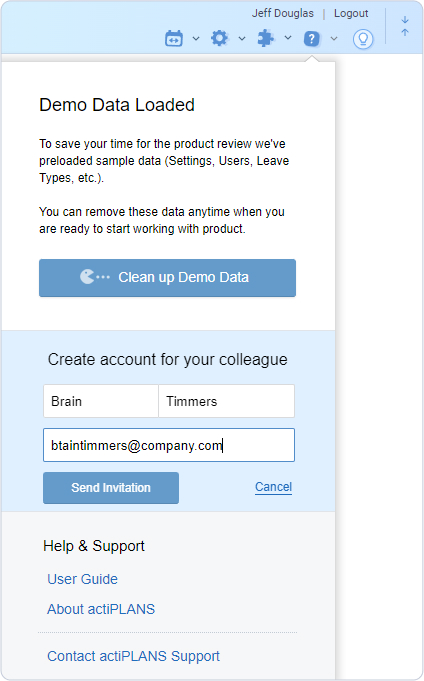
After you have reviewed system functionality and are ready to enter your own data, you can easily delete the demo data from the system – just click on the ❔ icon located at the top of the interface and choose Clean Up Demo Data.
The demo data that will be deleted includes demo leave types, demo user accounts, and demo leave requests. All data that you have created manually will be kept.
After removing demo data from the system, you can configure your actiPLANS account from scratch so that it meets your company’s needs.
This process is described in more detail in the Configuring actiPLANS for the First Time section below.
Configuring actiPLANS for the First Time
Initial data setup consists of the following simple steps:
After you have completed these steps, you and your colleagues will be ready to submit, modify, approve or reject leave time with nice-looking and intuitive actiPLANS interfaces.
1. Define General Product Settings
It is recommended to start with configuring general system settings:
Configure your calendar layout
Define your corporate calendar
Configure your default PTO & Sick Days accrual rules
Review settings that define access privileges to leave requests in the system interfaces
Create accounts for your colleagues and send them invitations to actiPLANS.
You can do that directly from the Help menu…
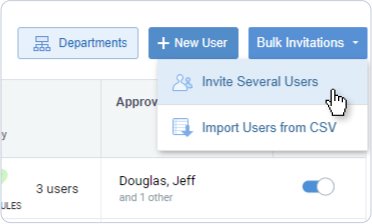
…or from the Users interface.
Click on the + New User button to invite employees one by one or create user accounts in bulk through Bulk Invitations.
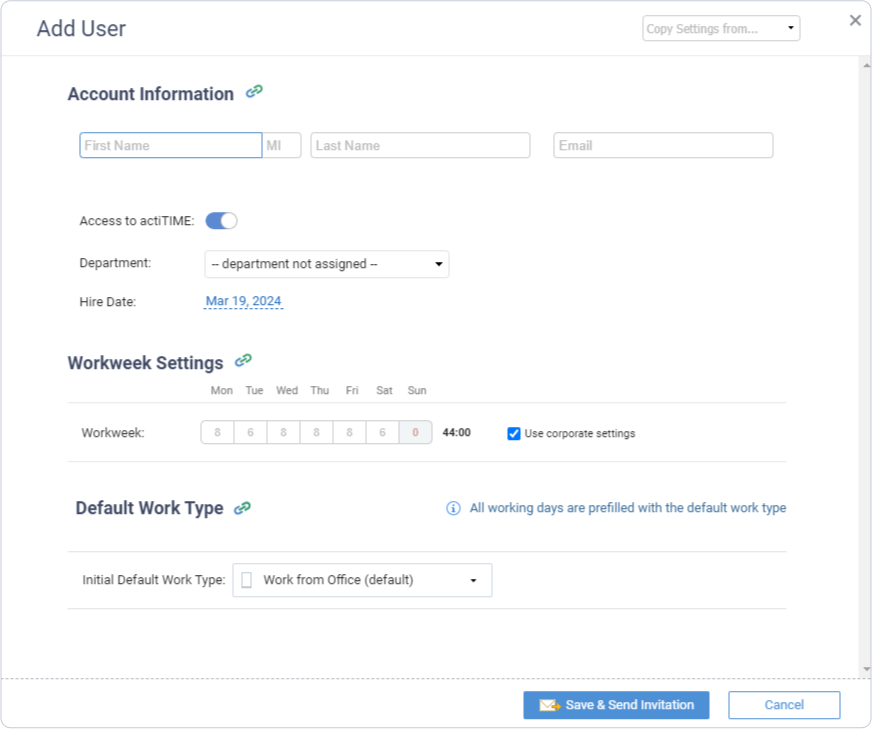
The + New User button leads to the Account Information interface, where you can configure all the required user settings before inviting someone to actiPLANS. Just fill in the data and press Save & Send Invitation:
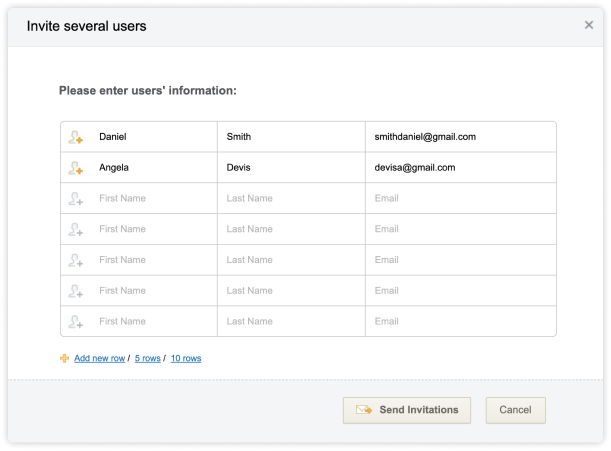
If you want to invite multiple users at once, click Bulk Invitations 🡪 Invite Several Users. Enter your employees’ names and emails in the opened window and hit the Send Invitations button. Other account settings – such as user department and time zone – can be edited afterward.
After your colleagues have registered in the system, grant them the permissions necessary for their everyday work. Use the Manage column of the User List to configure these permissions:
Grant Manage Leave Time Requests permission to the managers who will be responsible for processing leave requests submitted by the regular system users.
Then assign leave time managers to regular users. You can configure permissions and assign leave time managers in the Account Settings Interface.
Grant Manage Leave Balances permission to the managers who will be responsible for managing users’ balances.
Note that a manager with Manage Leave Balances permission has access to PTO & Sick Days balances and accrual rules of all registered users. Then configure users’ PTO & Sick Days settings in the PTO & Sick Days Settings Interface.
Grant Manage System Settings permission to your colleagues who will help you manage user accounts, permissions, and system settings.
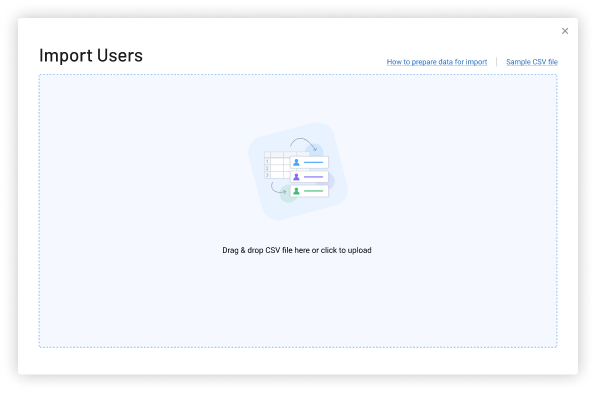
You may also add new users to the system by importing data from a CSV file:
Go to Bulk Invitations 🡪 Import Users from CSV
Download the CSV sample to prepare your data for import
Upload the created CSV file to the system
Once done, every employee mentioned in the CSV file will receive an email invitation and be able to use actiPLANS right away (no extra account editing required).
3. Create Leave Types
actiPLANS allows users to create leave requests for the registered types of leaves.
The leave type selected for a request defines the name of the leave, color & icon to be used for displaying this request in the charts, if and how the requested leave time should affect users’ PTO or Sick Days balances, and whether the request for the leave type requires approval.
Review pre-configured leave types and create additional ones in the Leave Types Interface.
By default, there are seven predefined leave types in the absence management system:
Time Off
Sick Leave
Vacation
Business Trip
Studies
Family Leave
Medical Treatment
Specify which leave types require the manager’s approval, and which should affect users’ PTO & Sick Days balances.
Learn more about PTO & Sick Days balance and leave requests.
4. Choose Your Schedule Type
actiPLANS lets you schedule employees’ working time on a visual timeline. But to do that, you first need to decide which type of schedule you want to create.
The type of schedule enabled in the system by default is Locations. However, you can change it to Events, Statuses, Activities, or any other custom option of choice. Then, the name of the Locations interface will change accordingly.
To start scheduling in actiPLANS:
Make sure to switch on the Locations functionality in General Settings.
Indicate how your type of schedule will be referred to in actiPLANS overall (as mentioned above, you can pick one of the pre-made options from the selector in General Settings or make up an entirely new name for the feature).
Add bespoke location types to your account via the Locations settings: give names to all of your custom schedule entities and attach unique color codes for them.
After that, the created locations (or other custom schedule entities) will appear above the visual timeline in the Locations interface and you may proceed to allocate them to your employees there.
Help & Support
actiPLANS interfaces are designed to be as intuitive as possible; however, if something is not clear to you or you need more information, don’t hesitate to contact our support team. Request a call or send us a message from the Help menu. You can attach a log file or a screenshot to the message to provide more technical details on your issue.
This website uses cookies, pixel tags, and local storage for performance, personalization, and marketing purposes. We use
our own cookies and some from third parties. By clicking ‘Accept,’ you agree to the use of all cookies. You can always
change your cookie settings by clicking on "Manage settings.” To learn more about our use of cookies, please see our
Cookie Policy
Privacy Preference Centre
When you visit any website, it may store or retrieve information on your browser, mostly in the form of cookies.
This information might be about your preferences or your device and is mostly used to make the site work as you
expect it to. The information does not usually directly identify you, but it can give you a more personalized web
experience. Because we respect your right to privacy, you can choose not to allow some types of cookies. Click on
the different category headings to find out more and change our default settings.