Leave Time & Balances Report
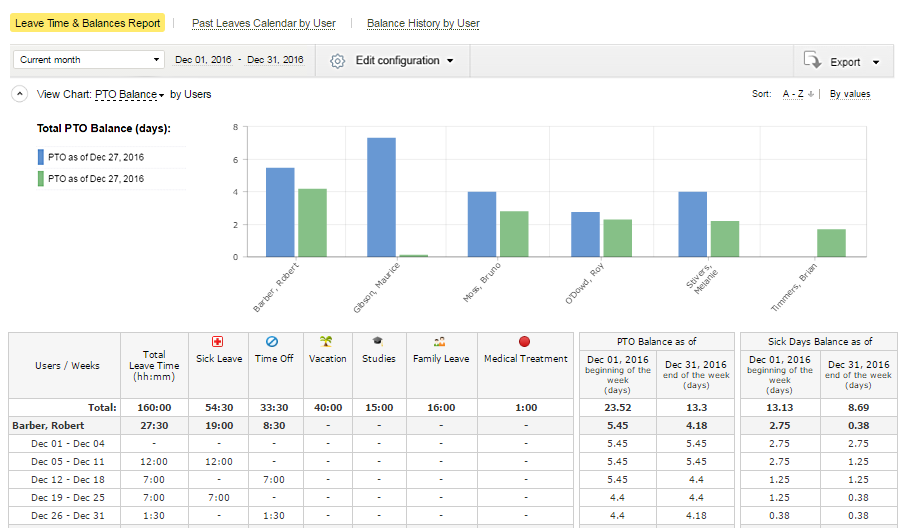
The Leave Time & Balances Report allows users to summarize time off and leave balance data. It can be generated in the form of a chart or table and exported as a CSV or PDF file.
When running this report, you may sort data by Leave Time, PTO Balance, or Sick Days Balance – just select the necessary option in the View Chart header.
If you select the PTO Balance or the Sick Days Balance, data will be displayed for the first and the last date within a specified timeframe.
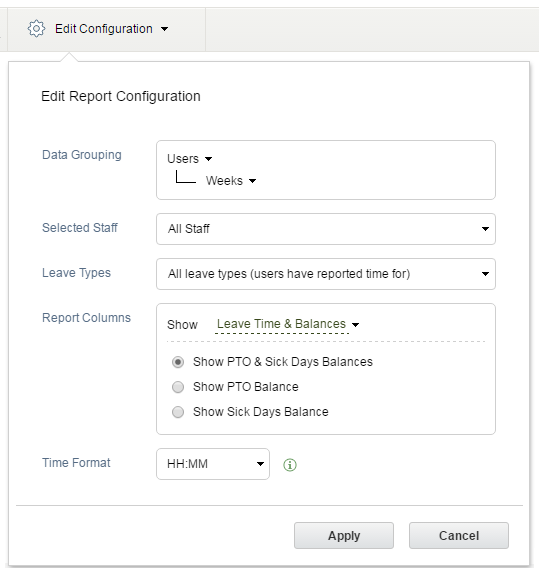
The Leave Time & Balances Report has a flexible configuration.
Up to two grouping levels are available for managers with the Leave Balances and/or Manage Requests permission: they may choose to review info either for all staff members or several users. At the same time, regular users may see merely their own leave time and balance data.
Plus, all users have an opportunity to filter data by period and leave types.
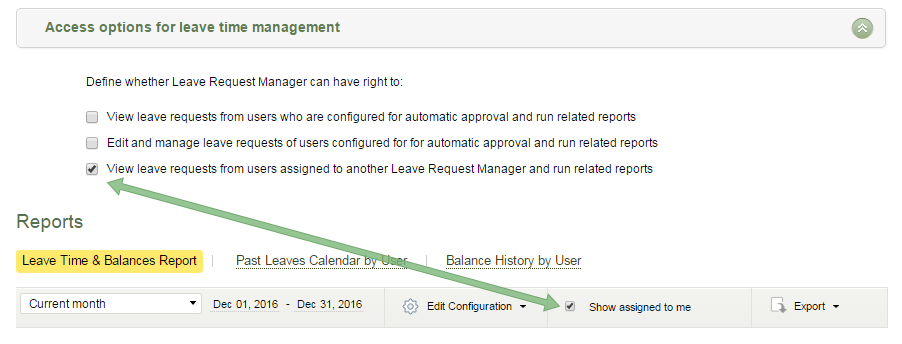
If the ‘View leave requests from users assigned to another Leave Request Manager and run related reports‘ option is selected in General Settings, the ‘Show assigned to me’ checkbox appears:
Locations Report
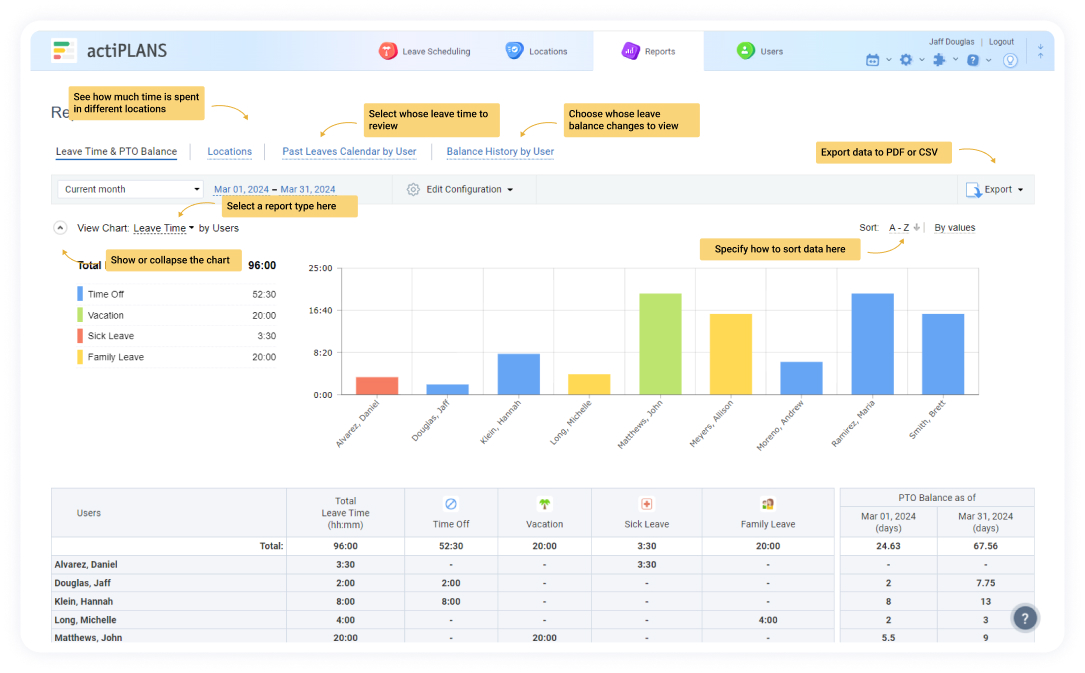
The Locations report demonstrates how much time you spent working in different locations for any period of choice.
It includes a colorful bar chart that visualizes data and simplifies the comparison of results for different location types, users, departments, etc. Plus, the report contains a detailed breakdown of hours by location and users in the list format.
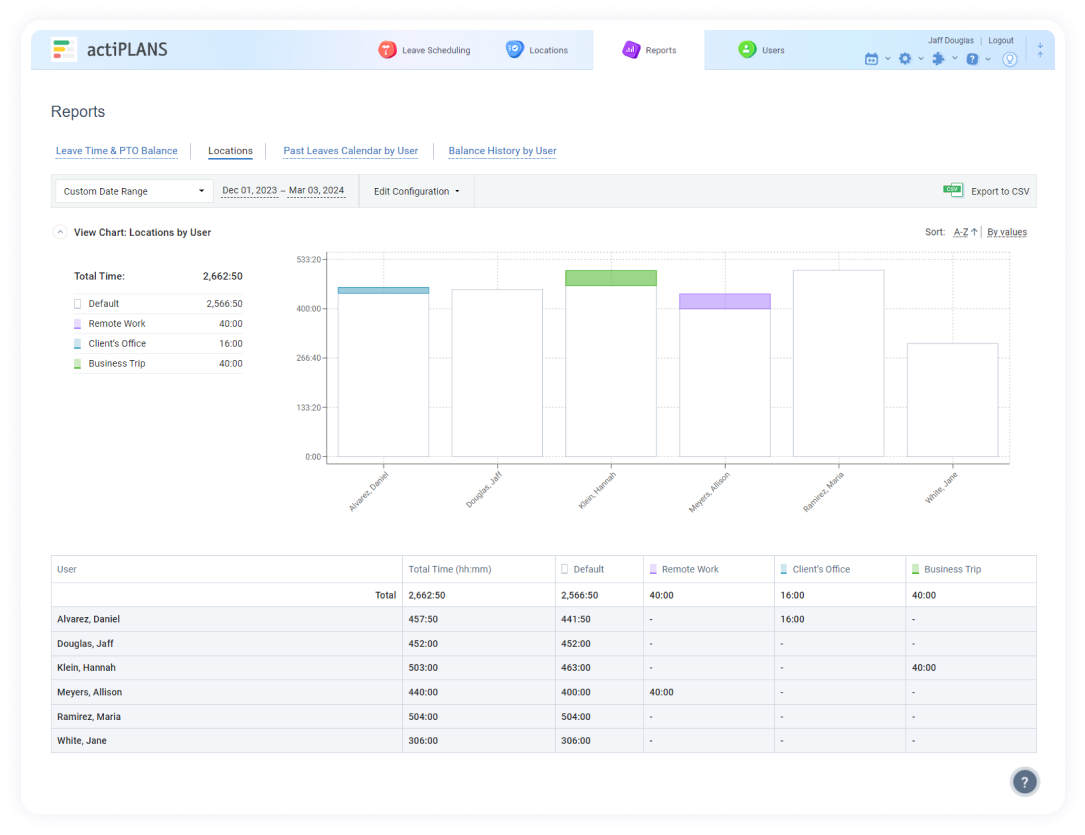
The Locations report grouped by Months (the top level) and Users (the bottom level).
The Locations report is available via the Reports tab in the navigation panel. It’s possible to configure it using the following parameters:
- Date range – You may choose a predefined time value from the drop-down menu (aka Custom Date Range): Today, Current Week, Current Month, etc. Besides, you can set any non-standard reporting period using the nearby date selector.
- Top-level grouping – This option allows you to group work scheduling data by Days, Weeks, and Months.
- Bottom-level grouping – It lets you categorize data by Users, Days, and Weeks. Plus, you may choose not to apply the bottom-level grouping at all.
- Selected users – You may choose to display the data only for specific users, your team, or certain departments. Moreover, you can run the report with data from users that are assigned to you.
- Location types – It’s possible to limit the number of locations included in the report, making it as detailed or concise as you want it to be.
- Time format – You can pick between the following time formats: HH:MM or ##.##
The Locations report can be exported as a CSV file. For this to happen, simply click on the export button at the top right corner of the interface once you’re done with the configuration.
Note: In case a user doesn’t have the “Manage Schedules” permission, they cannot see other users’ data in the report.
Past Leave Calendar
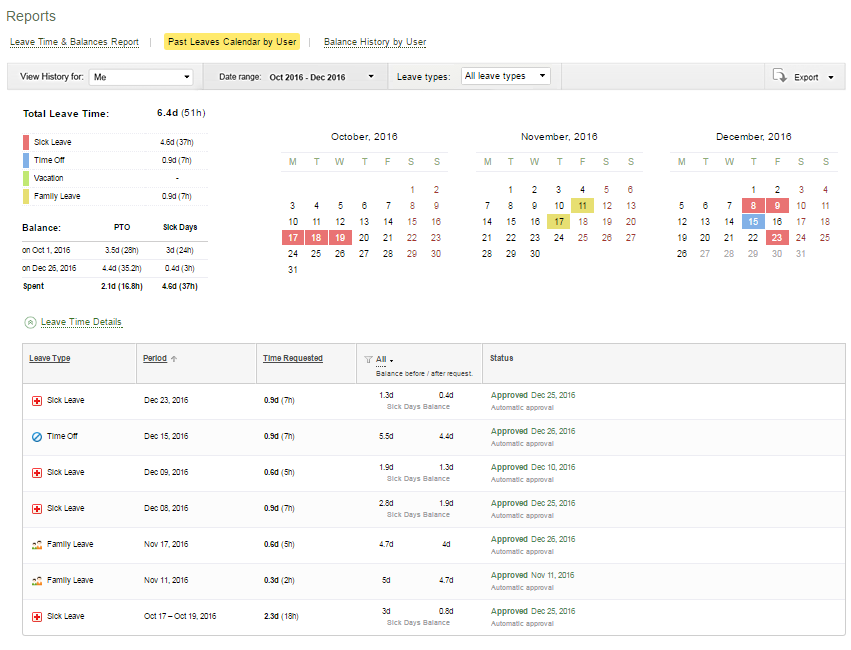
actiPLANS records the history of approved leave time. The history is updated when the user’s past leaves are deleted or modified.
When actiPLANS is integrated with actiTIME, leave time history shows actual leave time recorded in actiTIME. If a past leave is edited in actiTIME, it is also updated in the Leave Time History in actiPLANS as well.
When actiPLANS is not integrated with actiTIME, past leaves are changed and deleted in the Schedule and Leave Scheduling interfaces. Leave time history is updated according to the modifications made in these interfaces.
Regular users can see their leave time history only; managers also have access to the leave time history of their assigned users. Both are available in the Past Leaves Calendar by the User tab of the Reports interface.
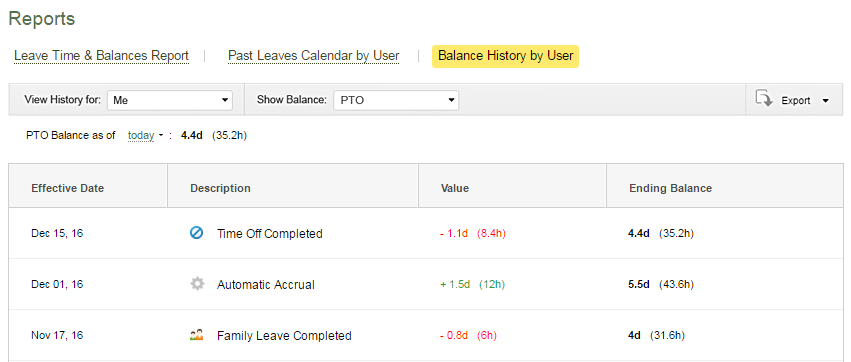
PTO & Sick Days Balance History
All changes applied to the user’s balances are recorded in the Balance History by User tab of the Reports interface. In particular, records are added to the history when:
- The user’s leave is completed, and this leave is associated with a leave type influencing PTO or Sick Days.
- One of the automatic accrual rules is triggered.
- Manual correction of the user’s PTO or Sick Days balance is made in the PTO or Sick Days Settings interface.
- Regular users can only see their personal leaves balance history under the Balance History tab of the Reports interface.
Managers can see the PTO or Sick Days balance history for every employee in the Balance History. This data is also available right in the User List and can be exported to PDF format for further analysis and statistics.